
First cut five squares - one large, four small. These five squares will result in four flying geese units. For 2"x4" finished units, the large square is 5 1/4" and the small squares measure 2 7/8".

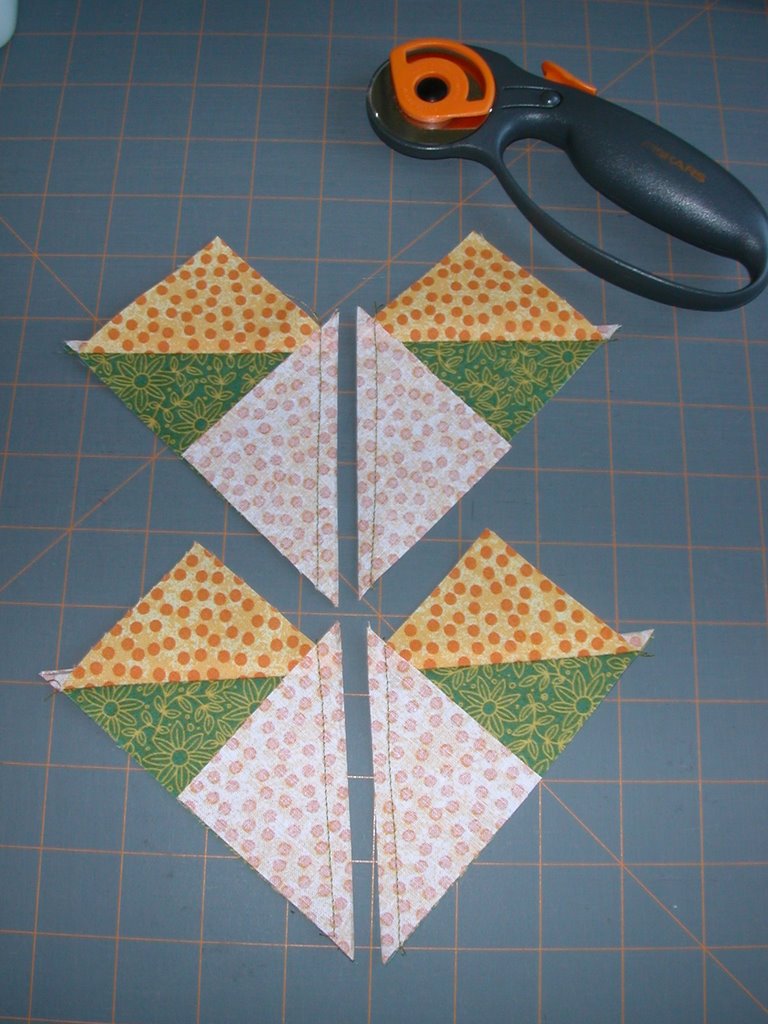
Place two of the small squares on the large square right sides together. Draw a line down the center of the small squares, then sew 1/4" from each side of this line.

Cut down the line you drew.

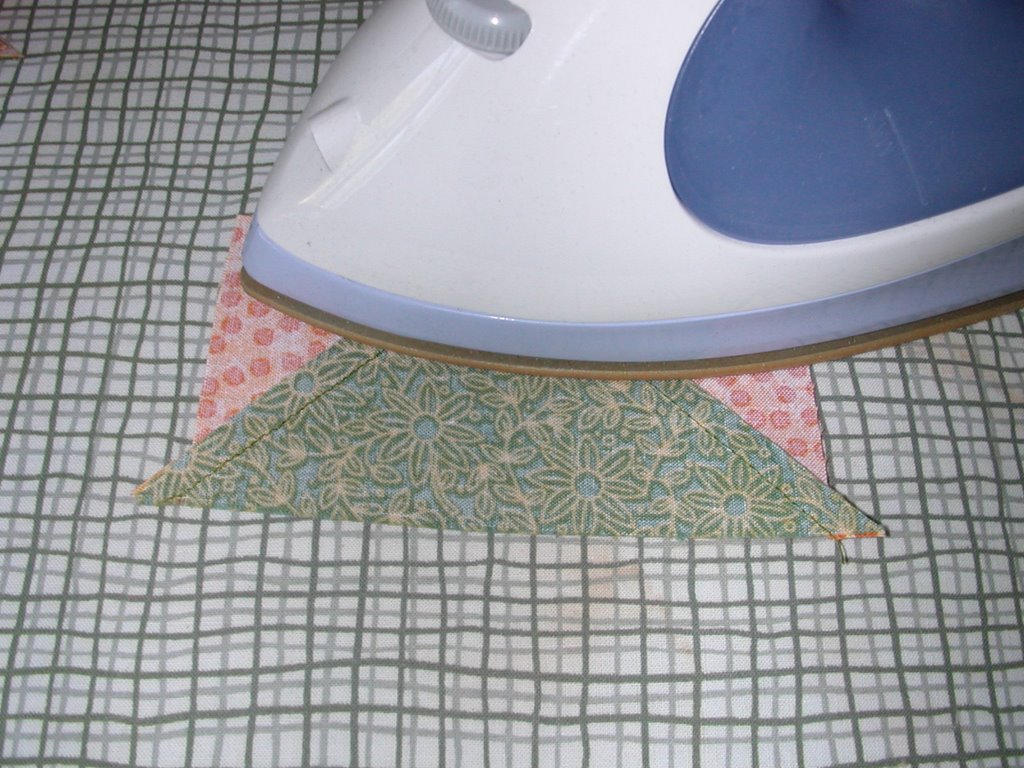
Iron the seam allowance towards the little triangles.

Place each of the remaining small squares on these pieces right sides together. Draw a line down the center of the small squares, then sew 1/4" from each side of this line.

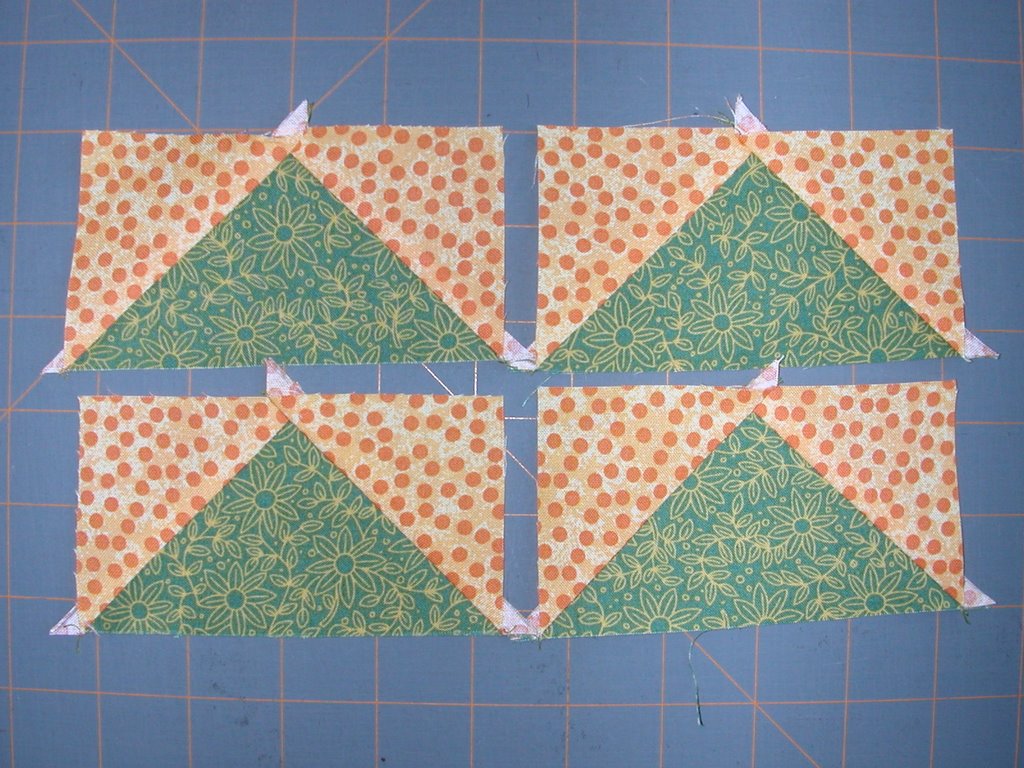
Cut down the lines you drew.
Iron the seam allowances toward the little triangles once again.
Voila!
For four finished flying geese measuring 1"x2", the large square measures 3 1/4" and the small squares measure 1 7/8". For four finished flying geese measuring 3"x6", the large square is 7 1/4" and the small squares are 3 7/8".
I know there are lots of ways to make flying geese - this is just the easiest way for me! If you give it a try, I'd love to hear from you!
I'm glad you explained that - I didn't quite get it when I asked last time. That looks like a good method - no waste.
ReplyDeleteThis is my favorite method for making flying geese - great pictures and explanations!
ReplyDeleteIt's great to see this done step by step - very clear, thank you!
ReplyDeleteNow my head hurts - 9pm on a Sunday night after a very busy day is just too late for me to be able to understand what look to be very good instructions!!!
ReplyDeleteThanks for your comment over on my blog :)
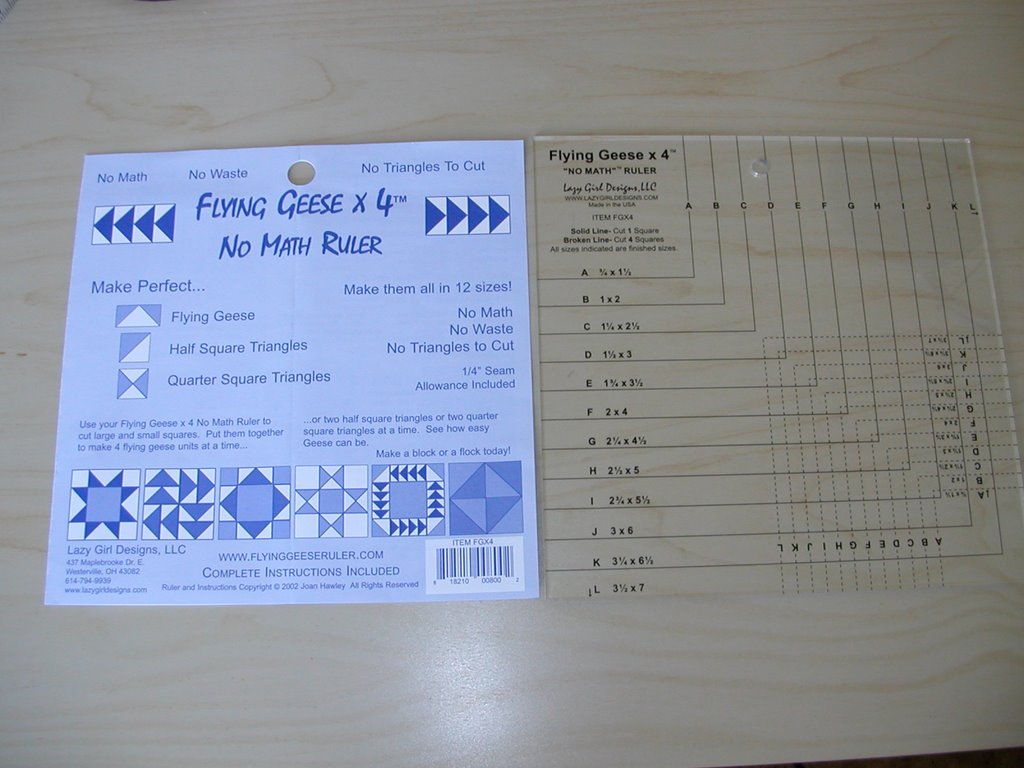
This ruler is certainly going on my wish list for Christmas. I've always struggled to get my geese with all their beaks and wings.
ReplyDeletethanks for the fantastic cyberworkshop for free. This ruler is on my actual wishlist now! greetings from Germany
ReplyDeleteWhat a clear tutorial on piecing these. Flying geese is one of my favorite patterns. You're inspiring me to make some with this easy approach. Thanks.
ReplyDeleteSuch a great way to make a flock of geese......... Great pictures. How kind of you to take the time to do that for us.
ReplyDeleteThat is so cool!!! But there is one point I'm confused about... Do you need to have the no math ruler to do this trick? Is this the method they tell you to use with the ruler?
ReplyDeleteI'm bookmarking this post. Thanks for the info!
Hi Hedgie...*VBS* what a great tutorial you wrote up! It IS a lot of work, and I so admire the patience needed to do each step, take the picture and write about it. And then get them all posted.
ReplyDeleteI really like the sound of this way you explained and will be trying it VERY soon!! Hugs, Finn
Responding to Lois R. for all to see.... No, you don't need the ruler to use this method. There are good instructions for this method that come with the ruler and with the ruler, you don't need to do any of the math. I've included the square sizes for three sizes of geese in the tutorial - if you'd like to know the dimensions for another size, just send me an email! Hope this clears it up. :)
ReplyDeleteI really love this method. Beth Ferrier uses it for her blocks of the month. I don't use any rulers for it though. I wish I had seen this post before I cut up all those little squares for the flying geese in my new quilt. I hate it when I do something the old way when I know a new and better way!
ReplyDeleteThanks for the tutorial - I could never "see" it before.
ReplyDeleteHow funny! I just finished making 128 flying geese using this method. And, no, I do not have this ruler. I just use my normal rotary ruler. /paula
ReplyDeleteThank you very much!!!!In Italy is not found very material for the patchwork! There is luckily the web :)))
ReplyDeletethank you, Hedgehog! I ordered the rule today, after reading your blog. THAT's soooooo easy - GREAT tool
ReplyDeletesummer greetings from Poland
Brigitte at beadtex blogspot
thanks for this tutorial! I am going to try it right away. (even without the ruler) thanks for the measurements.
ReplyDeletei am going to try this today! thanks so much.
ReplyDeleteI found this via crazymomquilts. What a great tutorial! I'm really excited to try it out. Thanks so much for sharing it. :)
ReplyDeletegreat tutorial.
ReplyDeletei saw this in pat sloan's 'beyond the basics' book and used it to make a table runner.
you can see it here:
http://rachel-griffith.blogspot.com/2008/06/its-never-to-early-to-quilt-for.html
Wow! That's the easiest explanation I've ever seen. Thanks!
ReplyDeleteI've got an upcoming project with lots of Flying Geese and I was dreading it but now I know I can handle it.
This morning will be spent practicing.
Thanks again!
That's a great tutorial! My very first quilt (well, except the class sampler) was a flying geese quilt for my grandparents. I wish I knew about your tutorial then! I cut every triangle, then sewed each individual piece together, bias edges and all.
ReplyDeleteI saw an interesting one seam flying geese method on the Quilt Show by Ricky Tims and Alex Anderson. It makes dimensional flying geese, and it's super simple. I posted about it here. The photo shows two versions - the bottom goose is a the regular way, then I turned back the edges on the top goose for a curved wing.
This comment has been removed by a blog administrator.
ReplyDeleteThank you, thank you, thank you! This was a clear tutorial, and a fast and easy way to make these!
ReplyDeleteThis comment has been removed by a blog administrator.
ReplyDeleteLoveli how to do by your pictures. Thanks a lot.
ReplyDeleteI LOVE this technique! It saves fabric, and no little cutting of points off! I'm all for saving fabric where I can.
ReplyDeleteI didn't know there was a ruler for it. I'm going to go online right now and look for it - that way I don't have to remember the size of the squares, or write it down and lose it!
Thanks for sharing!!
Great tutorial. Thank you for making it.
ReplyDeleteThis comment has been removed by a blog administrator.
ReplyDeleteCheck your measurements! The squares to cut for a finished 1" x 2" flying geese should be 3 1/4" & 1 7/8". CDB
ReplyDeleteThanks, anonymous! I've corrected it above.
ReplyDeletei have the ruler & love this method. Jo morton started me on this.
ReplyDeletegreat.
kim
This post is 5 years old, but the content is still awesome! I'd been trying to figure out how to convert dimensions for the regular (wasteful) flying geese into the efficient method, and now I have the conversion down. Thanks!
ReplyDeleteI'm so glad I followed a link from crazymomquilts here for this tutorial. My 10 daughter has decided on a flying geese pattern for a quilt that she's making for a school project. I will admit that I inwardly groaned because I've never considered anything with triangles good for a beginner. Reading through your tut gives me hope that we'll be able to do this with minimal tears (on both our parts. ;) ) Thanks!!
ReplyDeleteThis is the neatest thing I have ever seen...
ReplyDeleteI've been working on this method and I'm going nuts. I need a FINISHED 2 1/2 x 4 1/2, so I cut the large square 5 3/4 square and the smaller ones are 3 3/8. When I'm done I have to cut off 1/4" off all around. Is it right that I'd have to square it off that much. I've found several online directions exactly the same, but none say they have to be squared off. So- the questions is, is it larger and needs to be squared off to the 2 1/2 x 4 1/2? All the directions I find show an even finished flying geese, 2x4. I'm definitely having problems with the math, but the idea works well. Obviously, it's me!
ReplyDeleteMaureen
This is a FANTASTIC tutorial - I"ve just made 500 flying geese with this (25 colours 6" by 3" finished geese). Thank you so much for your time on teaching me this. It's my third quilt and is going to be my wedding quilt. thanks again!
ReplyDeleteOh My Thank You! I'll try it. I have been postponing a small quilt of flying geese for my sister. Just don't know how. Thank you. I'll try this one!!
ReplyDeleteWOW, I do love your easy/no waste method! I have several quilts (for charity) with 3"x5 1/2" flying geese to make. Do you think you could give me the cutting sizes for these measurements? I'd really appreciate this! Thank you.
ReplyDeleteCarol from Australia
Going to try this method.
ReplyDeleteIf my large square is unfinished 12” x 12” what would unfinished dimensions of 4 smaller squares be?
ReplyDelete